mdbook-nix-repl
| Crates.io | mdbook-nix-repl |
| lib.rs | mdbook-nix-repl |
| version | 0.5.8 |
| created_at | 2025-12-10 20:35:38.553971+00 |
| updated_at | 2026-01-11 18:11:14.55959+00 |
| description | An mdBook preprocessor to provide nix-repl functionality within mdbook |
| homepage | https://github.com/saylesss88/mdbook-nix-repl |
| repository | https://github.com/saylesss88/mdbook-nix-repl |
| max_upload_size | |
| id | 1978752 |
| size | 79,627 |
 T. Sawyer (saylesss88)
documentation
README
mdbook-nix-repl
Interactive Nix REPL–style code blocks for mdBook.
This preprocessor lets you write fenced blocks like:
```nix repl
1 + 1
```
In the rendered book you get a “Run” button that sends the code to a secure local Nix evaluation service and shows the result inline.
📦 Version Check: The preprocessor validates mdBook compatibility at runtime and will warn if there's a version mismatch. This helps catch potential API incompatibilities early.
Quick Start
- Install the tool:
cargo install mdbook-nix-repl
- Initialize your book: Go to your mdBook directory and run:
If you don't already have a theme/index.hbs file (you likely do), create one
with the following command.
⚠️ Warning: mdbook init --theme wipes your /theme directory, book.toml,
and .gitignore files if they exist, back them up first if necessary.
# Only run this if you don't have a `theme/index.hbs` file
mdbook init --theme --force
# Initialize the plugin files and backend
mdbook-nix-repl init --auto
This command automatically creates the theme/ files, generates a unique
authentication token, injects the necessary scripts into index.hbs, and
creates the backend server files.
- Enable the plugin: Add this to your
book.toml:
[preprocessor.nix-repl]
command = "mdbook-nix-repl"

[output.html]
additional-js = ["theme/nix_http.js"]

# Optional override default endpoint
# endpoint = "http://localhost:9000"
- Run the backend: The
initcommand output provided the token you need. Open a separate terminal and run the server using that token:
# 1. Get your token from theme/index.hbs if you lost it
# Look for window.NIX_REPL_TOKEN = "..."

# 2. Export it
export NIX_REPL_TOKEN=your_token_here

# 3. Run the service (Container recommended)
cd nix-repl-backend

podman build -t nix-repl-service .

podman run --rm \
  -p 127.0.0.1:8080:8080 \
  -e NIX_REPL_BIND=0.0.0.0 \
  -e NIX_REPL_TOKEN=$NIX_REPL_TOKEN \
  --cap-drop=ALL --security-opt=no-new-privileges \
  localhost/nix-repl-service
- If
podman build -t nix-repl-service .fails, trypodman build --no-cache -t nix-repl.service .
- Serve your book:
mdbook serve
✔️ Custom endpoints
If you need an endpoint other than the default http://localhost:8080/, set it
in book.toml before running mdbook-nix-repl init --auto.
Example book.toml:
[preprocessor.nix-repl]
# ...snip...
endpoint = "http://localhost:9999/" # trailing "/" optional
This value gets injected into theme/index.hbs, so the frontend will call
whatever host/port you configure here.
If you change the host port (like 9999), make sure your container publish rule
matches it, e.g. podman run --rm -p 127.0.0.1:9999:8080 ... (host port 9999
forwarded to container port 8080).
If you update endpoint later, rerun mdbook-nix-repl init to re-inject the
updated value into the theme.
The podman echos should adjust to your chosen custom endpoint and suggest the
correct podman run command. You can always double check by looking at what was
injected into the theme/index.hbs.
Usage in Markdown
Use fenced blocks tagged as nix repl:
2 + 2
Output: 4
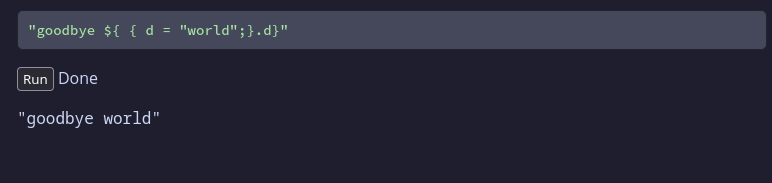
"goodbye ${ { d = "world";}.d}"
Output: "goodbye world"
The preprocessor rewrites these into interactive blocks with a “Run” button and an output area.
The parser picks up ---nix repl blocks that are indented, and blocks with more
than three tics (```)
Security Model
This tool is designed for local development. To ensure safety, it implements several security layers:
-
Authentication: The browser and server share a randomly generated secret token (
NIX_REPL_TOKEN). Requests without this token are rejected (403 Forbidden).🔐 Token Security: The authentication token is generated using cryptographically secure random number generation (192 bits of entropy), making it computationally infeasible to guess or brute-force. Each
initrun produces a unique, unpredictable token. -
Localhost Only: The server binds strictly to
127.0.0.1on the host (via port mapping), preventing access from the local network or internet. -
Strict CORS. Only exact local origins (for example
http://localhost:3000andhttp://127.0.0.1:3000) are allowed, rather than substring matches or wildcards, to prevent drive‑by requests from other sites. -
Container Hardening: The recommended Podman/Docker setup drops all root capabilities (
--cap-drop=ALL) and prevents privilege escalation (no-new-privileges). -
Memory & Time Limits: The server enforces strict 1MB payload limits and 5-second execution timeouts to prevent resource exhaustion.
How It Works
The preprocessor only generates HTML; it does not talk to Nix directly. A small
JS helper (theme/nix_http.js) sends the code to an HTTP endpoint and displays
the result.
The init command sets up the following integration for you:
-
Frontend Script: Creates
theme/nix_http.jsto handle the UI logic. -
Theme Injection: Injects the endpoint and auth token into
theme/index.hbs:<script> window.NIX_REPL_ENDPOINT = "http://127.0.0.1:8080/"; window.NIX_REPL_TOKEN = "a1b2c3d4..."; </script> -
Backend Generation: Creates a
nix-repl-backend/directory containing a Rust server implementation and a multi-stage Dockerfile.
Backend Setup
Option A: Containerized (Recommended)
For a secure, isolated setup, the Nix eval server runs inside a hardened container. The container build process compiles the Rust server automatically.
1. Build the image:
cd nix-repl-backend
podman build -t nix-repl-service .
2. Run securely:
export NIX_REPL_TOKEN=... # From your index.hbs
podman run --rm \
  -p 127.0.0.1:8080:8080 \
  -e NIX_REPL_BIND=0.0.0.0 \
  -e NIX_REPL_TOKEN=$NIX_REPL_TOKEN \
  --cap-drop=ALL --security-opt=no-new-privileges \
  localhost/nix-repl-service
Option B: Native (NixOS Users)
If you are on NixOS or have Nix installed on your host, you can run the server directly.
1. Build the server:
cd nix-repl-backend
cargo build --release
2. Run the binary:
export NIX_REPL_TOKEN=... # From your index.hbs
./target/release/nix-repl-server
By default the server binds to 127.0.0.1:8080 for safer native runs; no bind
variable is required. To expose beyond loopback (not recommended), set
NIX_REPL_BIND=0.0.0.0 before running.
⚠️ Security Warning: Running natively is less secure than the container method. While
nix evalis sandboxed, running the server directly on your host lacks the resource limits (CPU/RAM) and filesystem isolation provided by the container. A "while true" loop in Nix could freeze your whole system. Use the container whenever possible.
Running the native server under a separate, minimally privileged user account (with limited home access and no sensitive credentials) reduces the impact if something goes wrong.
Option C: NixOS Module (Recommended for NixOS Users)
In NixOS, everything defined in your configuration is built into the
world-readable /nix/store. If you set NIX_REPL_TOKEN="my-secret" directly in
your Nix config, any user on the system could read it by inspecting the store
path.
Instead, this setup uses the environmentFiles option in the container module.
This tells systemd to load the token at runtime from /etc/nix-repl-server.env,
a standard file restricted to root (mode 600). The token exists only in that
protected file and the running process's memory, never in the Nix store.
I've added a flake.nix to the mdbook-nix-repl repo, you can add it as a
flake input:
flake.nix:
# flake.nix
{
  inputs = {
    nixpkgs.url = "github:nixos/nixpkgs/nixos-unstable";

    mdbook-nix-repl.url = "github:yourname/mdbook-nix-repl?dir=server";
  };

  outputs = { self, nixpkgs, mdbook-nix-repl, ... }: {
    nixosConfigurations.magic = nixpkgs.lib.nixosSystem {
      system = "x86_64-linux";
      modules = [
        ./configuration.nix

        mdbook-nix-repl.nixosModules.default
      ];
    };
  };
}
configuration.nix:
{ pkgs, ... }:
{
  imports = [
  ];

  # This option is now provided by the module you imported from the flake
  custom.nix-repl-server = {
    enable = true;
    port = 8080;
    tokenFile = "/etc/nix-repl-server.env";
  };
}
- Copy the value of
NIX_REPL_TOKENintheme/index.hbs, and add create file/etc/nix-repl-server.env:
# Create the file with strict permissions (root read-only)
sudo touch /etc/nix-repl-server.env
sudo chmod 600 /etc/nix-repl-server.env

# Edit it to add: NIX_REPL_TOKEN=your_token_from_index_hbs
sudo vim /etc/nix-repl-server.env
Expected format:
NIX_REPL_TOKEN=9deb7efadb74b9e962e7911bb5caf3b3fef275a1b915b526
- Rebuild, and the server will now be running at boot.
Protocol
-
Request: POST
NIX_REPL_ENDPOINT- Headers:
X-Nix-Repl-Token: <token> - Body:
{ "code": "1 + 1" }
- Headers:
-
Response:
{ "stdout": "2\n" }or{ "error": "..." }